Yes, there are even more methods for toning monochrome images !
After applying a Photoshop Color Fill or Photo Filter Layer, add a new Levels adjustment layer and make sure that the blending mode is Color.
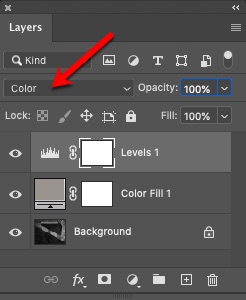
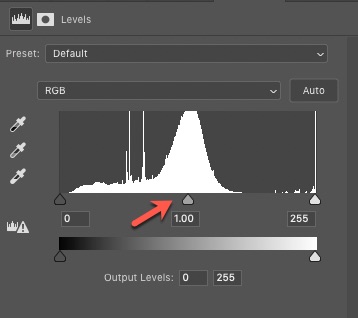
The Levels adjustment provides 2 sets of controls. The first control is a slider (red arrow) which controls mid-tone brightness via a Gamma function. As we slide the slider to the left and right, we move the area which gets the most concentrated toning.
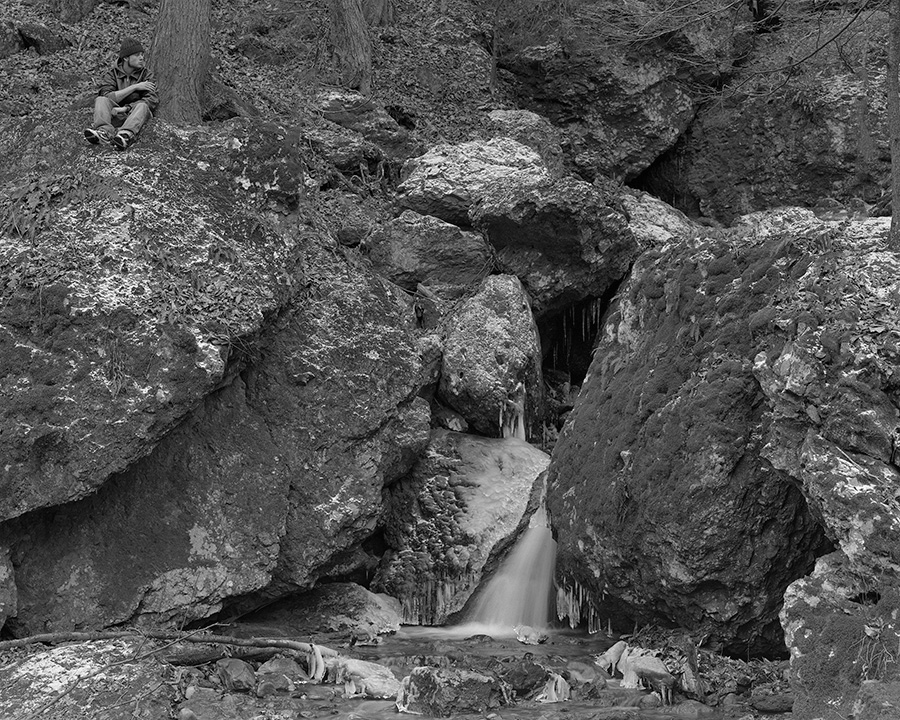
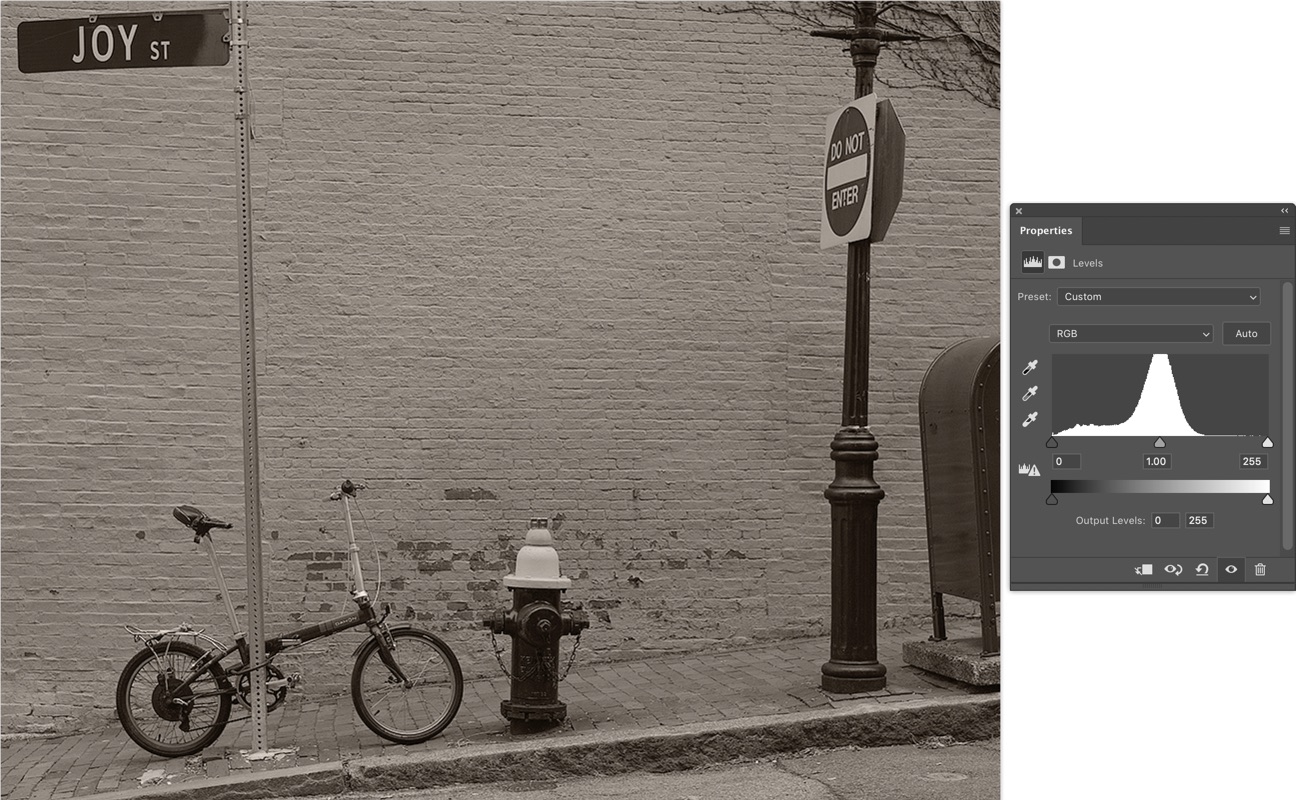
Grayscale image
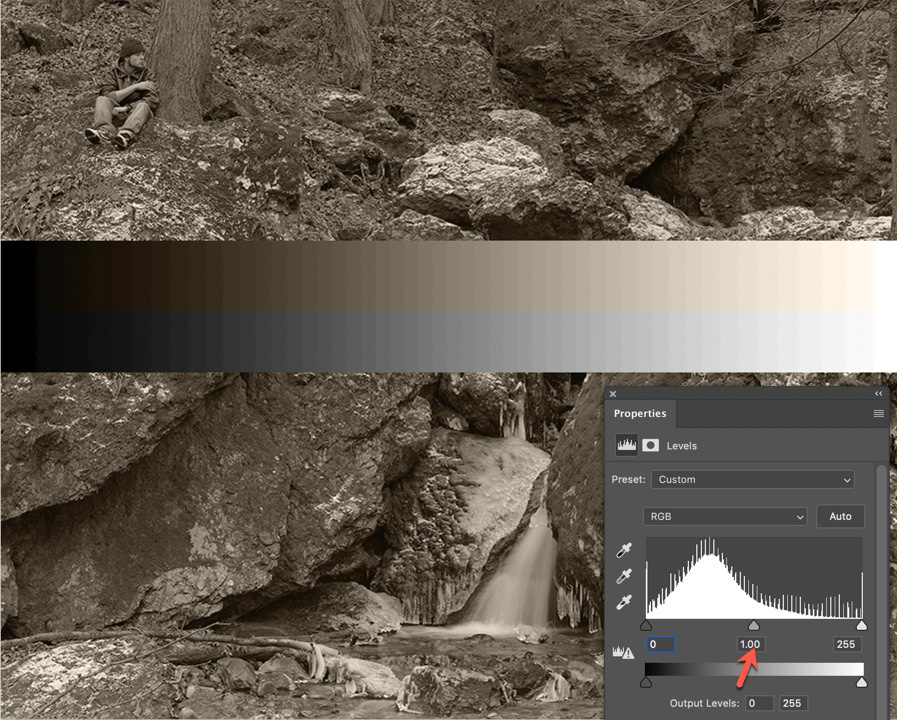
After applying a Color Fill Layer the Gamma slider is at its default setting of 1.00
Toning has been applied across the entire brightness range.
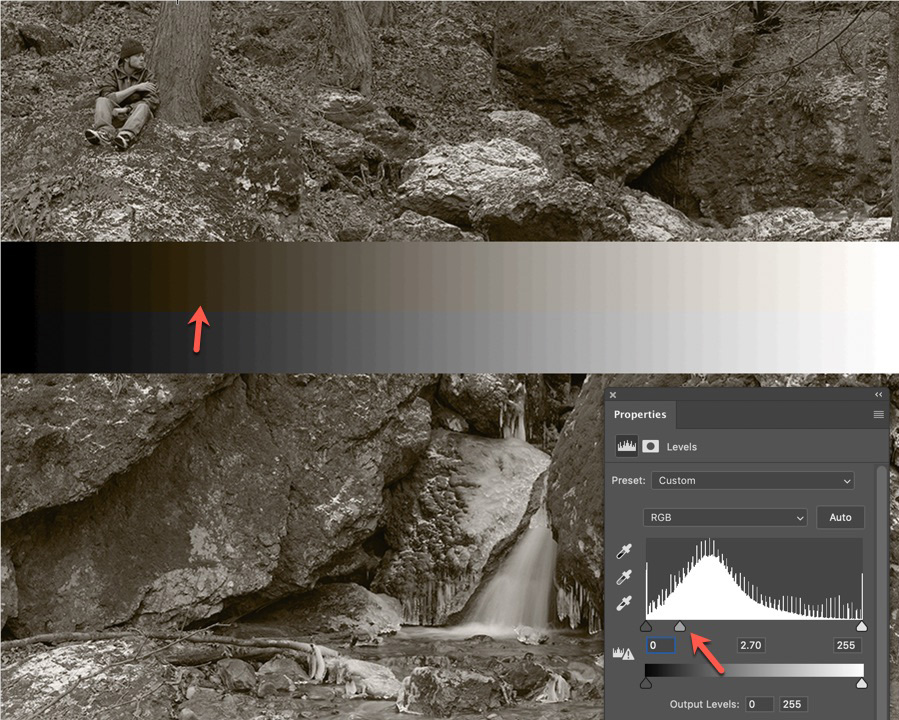
After moving the Gamma slider to the left, toning is emphasized at the lower portion of the brightness scale.
The water, ice and snow appear more white: a more natural treatment than uniform toning ?
Because the Gamma adjustment is a curve, the effect is gradual, with no abrupt cutoff.
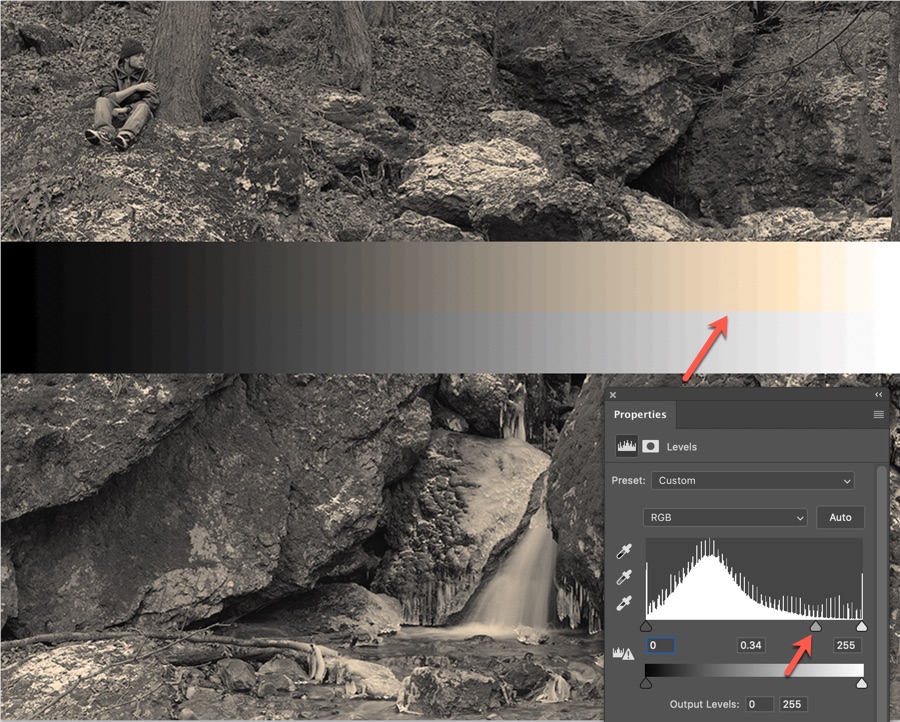
After moving the Gamma slider to the right, toning is emphasized at the higher portion of the brightness scale.
The water, ice and snow are more deeply toned: an inappropriate treatment for this photograph ?
Because the Gamma adjustment is a curve, the effect is gradual, with no abrupt cutoff.
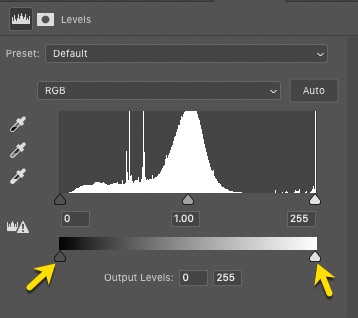
The second control is a pair of sliders (yellow arrows) which limit the output values at the low and high end of the brightness scale. Because these values are discrete or step-wise, the effect not gradual: tones are merely cut off at the specified brightness levels.
Grayscale image
After applying a Color Fill Layer the Output Levels sliders are at their default settings.
Toning has been applied across the entire brightness range.
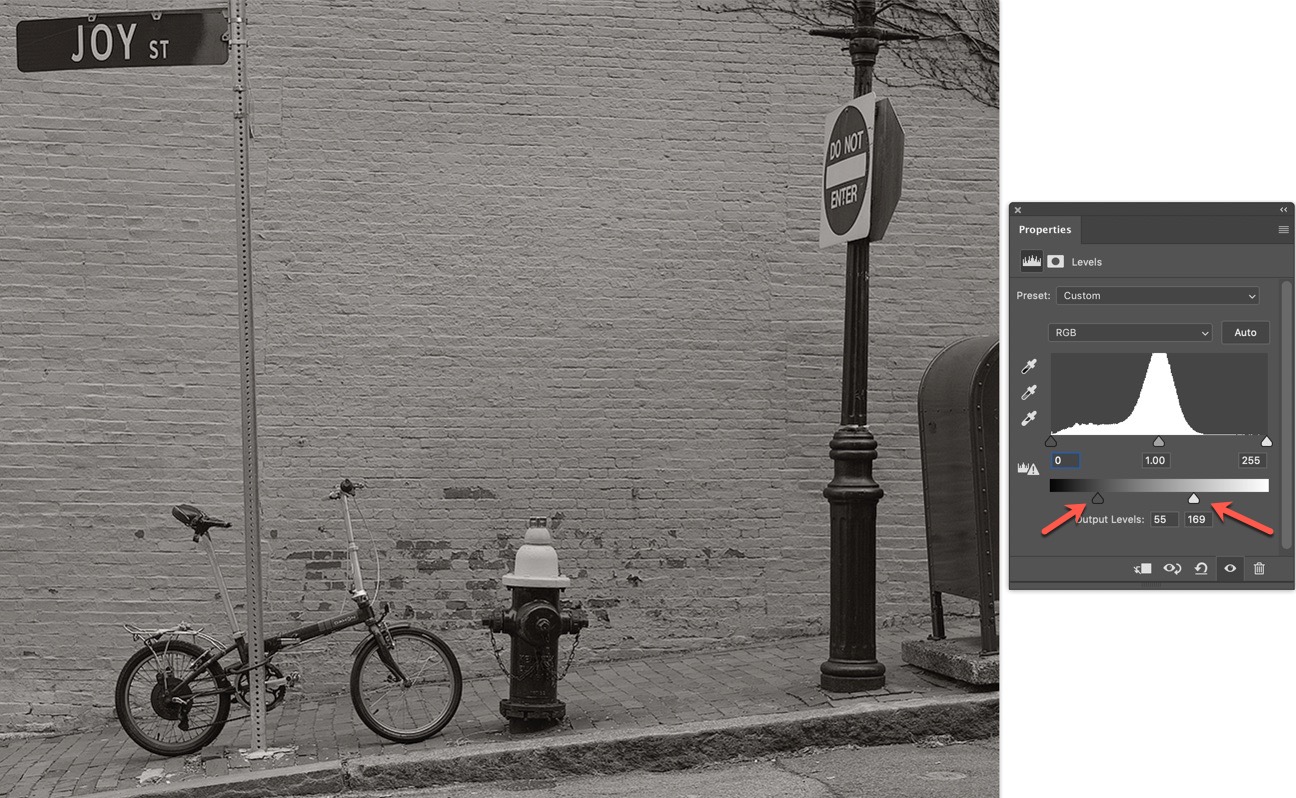
After adjusting the sliders, we have restricted toning to the middle of the brightness scale.
The lower and higher ends have been clipped: blacks appear black and whites appear white.
You may want to scroll up to the grayscale image to compare.
Here's another approach which gives us even finer control and avoids abrupt transitions: the Blend If sliders on the Layer Style panel.
 .
.
For very fine control of how a layer blends with other layers, Photoshop provides the Blend If sliders. They let us specify the cutoff points along the tonal scale where the adjustment will appear, depending on the tonal range of the layer itself, or the layer below it.
After applying a Color Fill layer, let's adjust its Layer Style. To bring up the Layer Style window, double-click the fill layer in the Layers stack, or go to Layer > Layer Style.
By default, the sliders specify strict cutoff points: the transition is abrupt, which can be distracting. To avoid abrupt transitions for a more natural effect, we can click on a single Blend If slider and convert it to a double slider. A double slider specifies a gradual or feathered transition. To convert a single slider to a double slider, click on the slider with either Windows: Alt+Click or Mac: Option+Click.
Here we have converted the sliders on the Underlying Layer into double sliders and dragged them apart from one another.


The start and end of a double slider denotes the beginning and end of a gradual transition where tones are applied. The left (dark) sliders increase the tone in a gradual way, and the right (white) sliders decrease the tone gradually.

The tone increases gradually from 49 to 128, then gradually decreases it from 150 to 255.
The image has been toned primarily in the middle of the brightness scale.
The blacks are black and the whites are white, but the middle values are toned.

The tone increase gradually from 0 to 48, then gradually decreases from 66 to 255.
The image has been toned primarily at the lower end of the brightness scale.

We have used a single slider on the left and a double slider on the right.
Photoshop will abruptly introduce toning at 41, then gradually decrease it from 115 to 255.

There is no toning below 41: the blacks are black.
Above that value, a warm tone increases gradually and rolls off gently into the high values.
The pure black has an impact which seems appropriate for this image.
This method is more advanced but combines everything into one Adjustment Layer

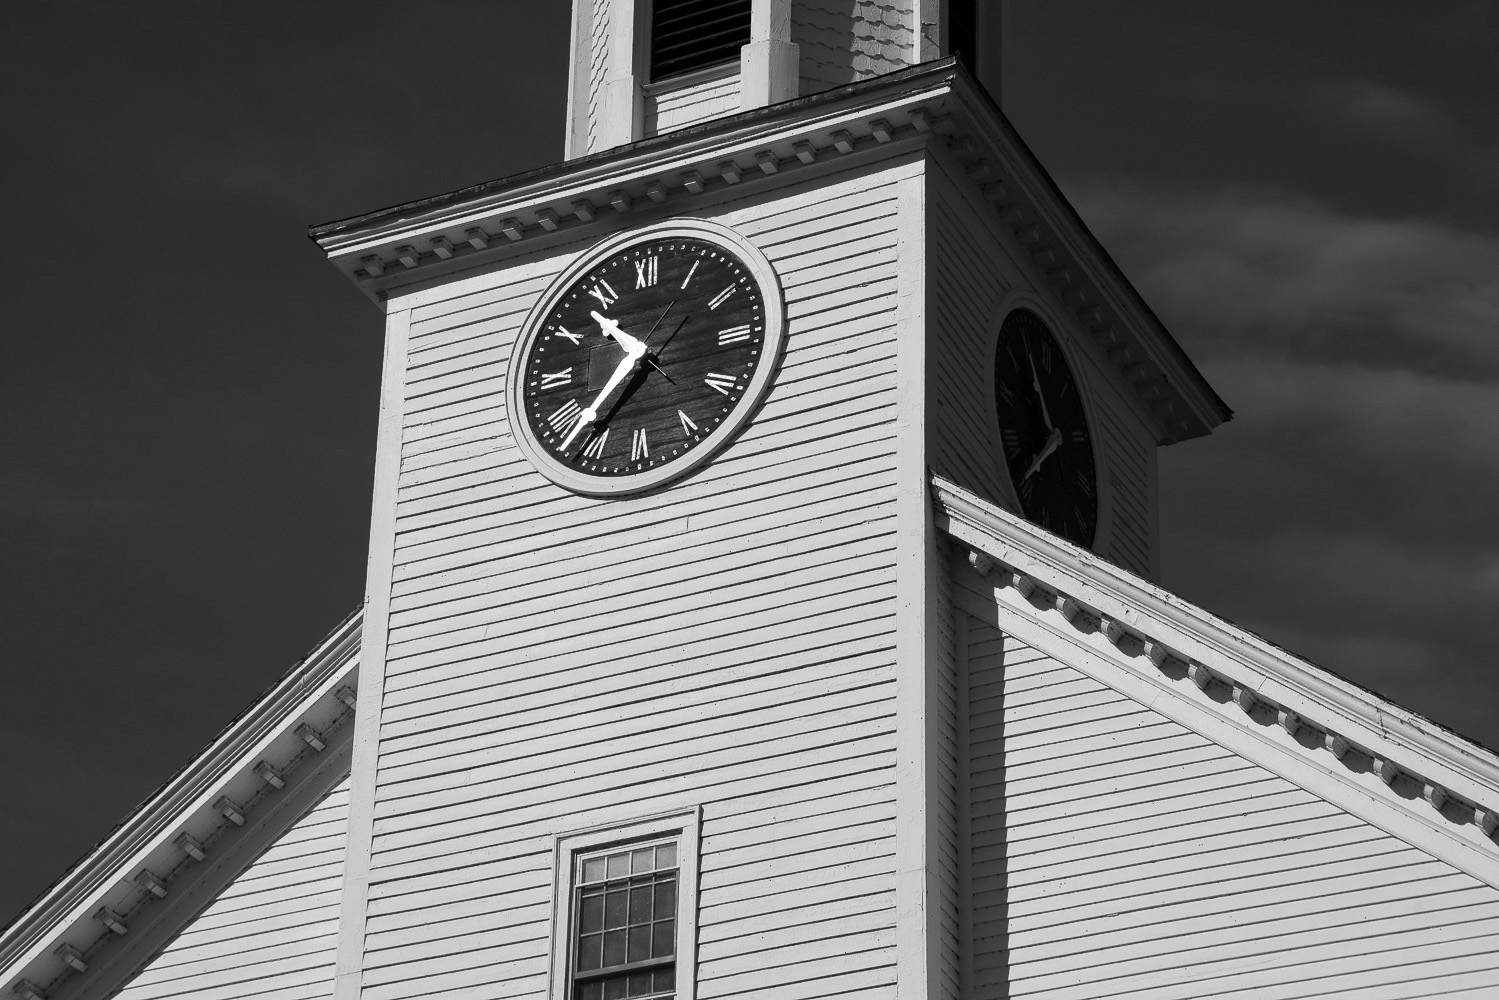
Grayscale image
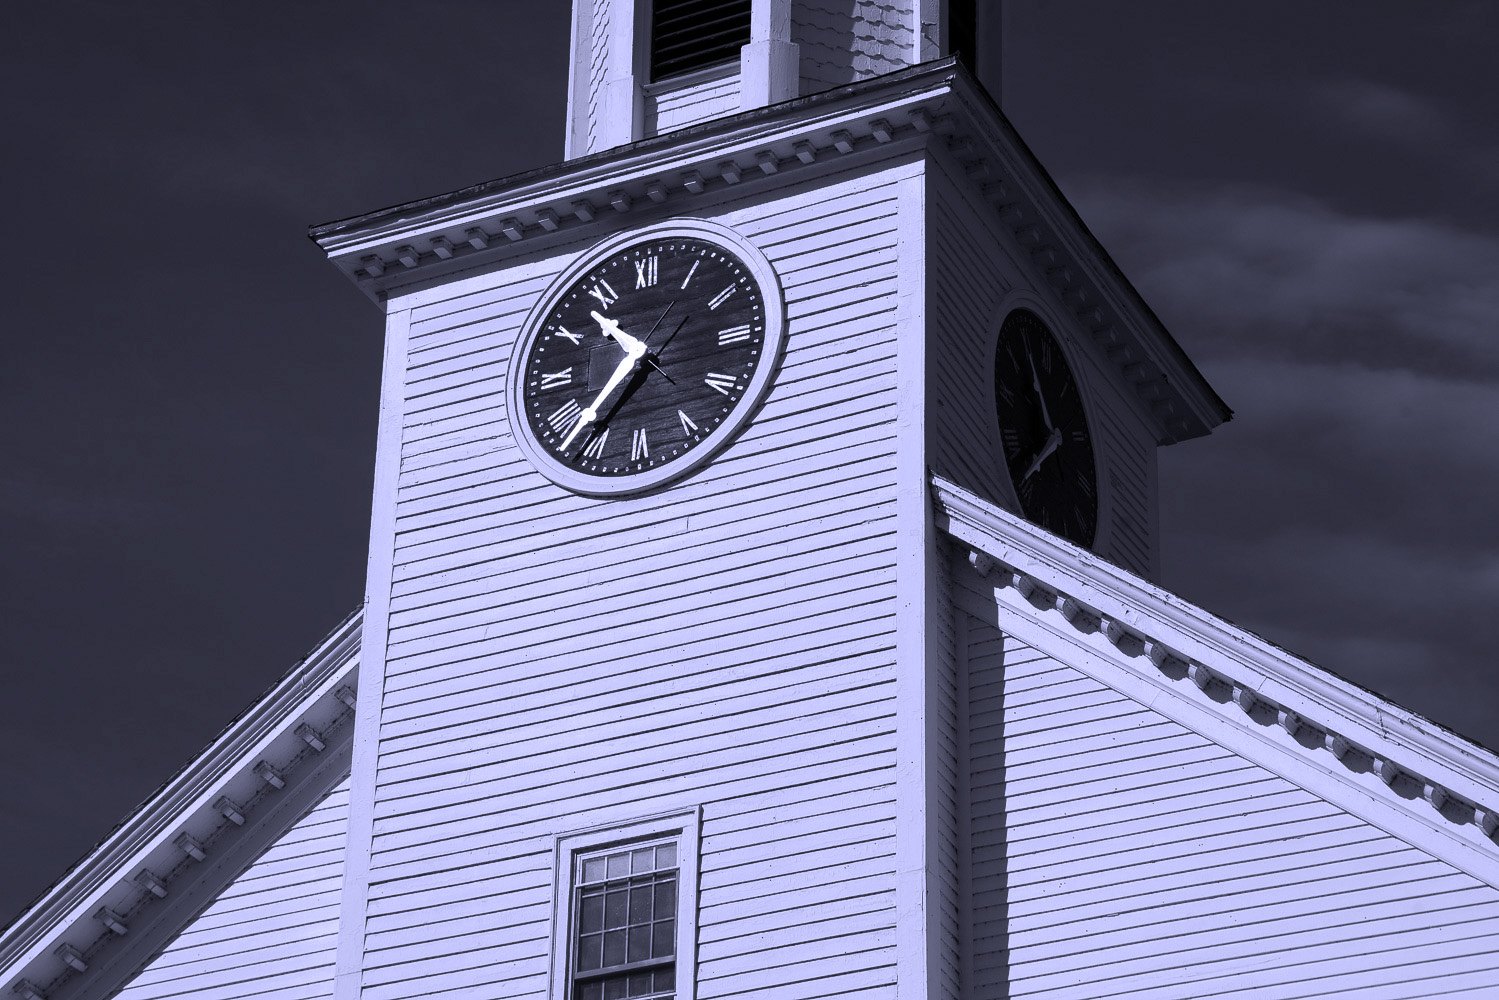
Duplicate the background layer and edit its Layer Style properties.
Add a Color Overlay and specify the toning color.
Adjust the Blend If settings to apply a gradual tone across the middle values
Adjust the Opacity of the Blend Mode.

There is no toning below 66: the blacks are black.
Above that value, a warm tone increases gradually and rolls off before reaching white

Final image
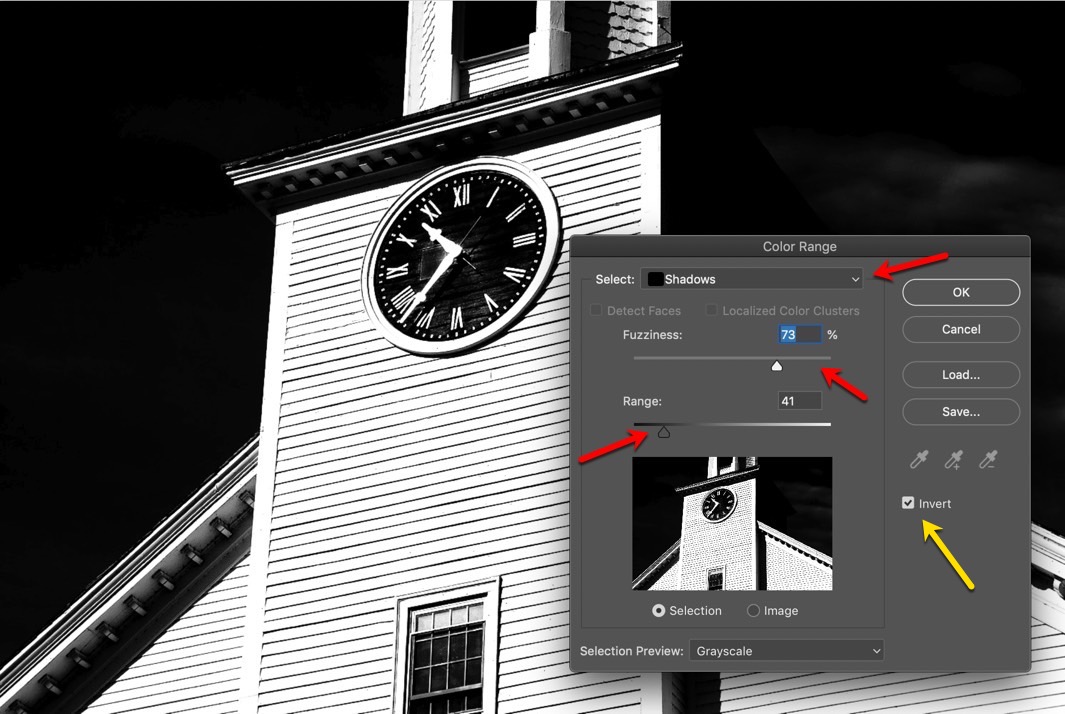
The Color Range tool is similar to the Blend If feature, but is quicker and gives us immediate feedback about which areas of the brightness scale we are selecting. We can create selections for highlights, midtones or shadows - and specify a degree of fuzziness over each selection.
Let's start with a grayscale image
Add a Photo Filter layer.
After we have added a blue Photo Filter layer, the entire range of brightness values has been toned.
Note: when we created the Photo Filter layer, Photoshop added a layer mask to that layer.

Click on the layer mask, then go to Select > Color Range...
Select the range of brightness values you would like to tone - highlights, midtones or shadows - and specify the fuzziness. Because we are creating a mask, we want to invert it, so that our chosen brightness range gets toned, not prevented from toning. Click the Invert option, then click OK.
We have selected the shadow values within a "fuzzzy" range. The sky and shaded areas have been selected.
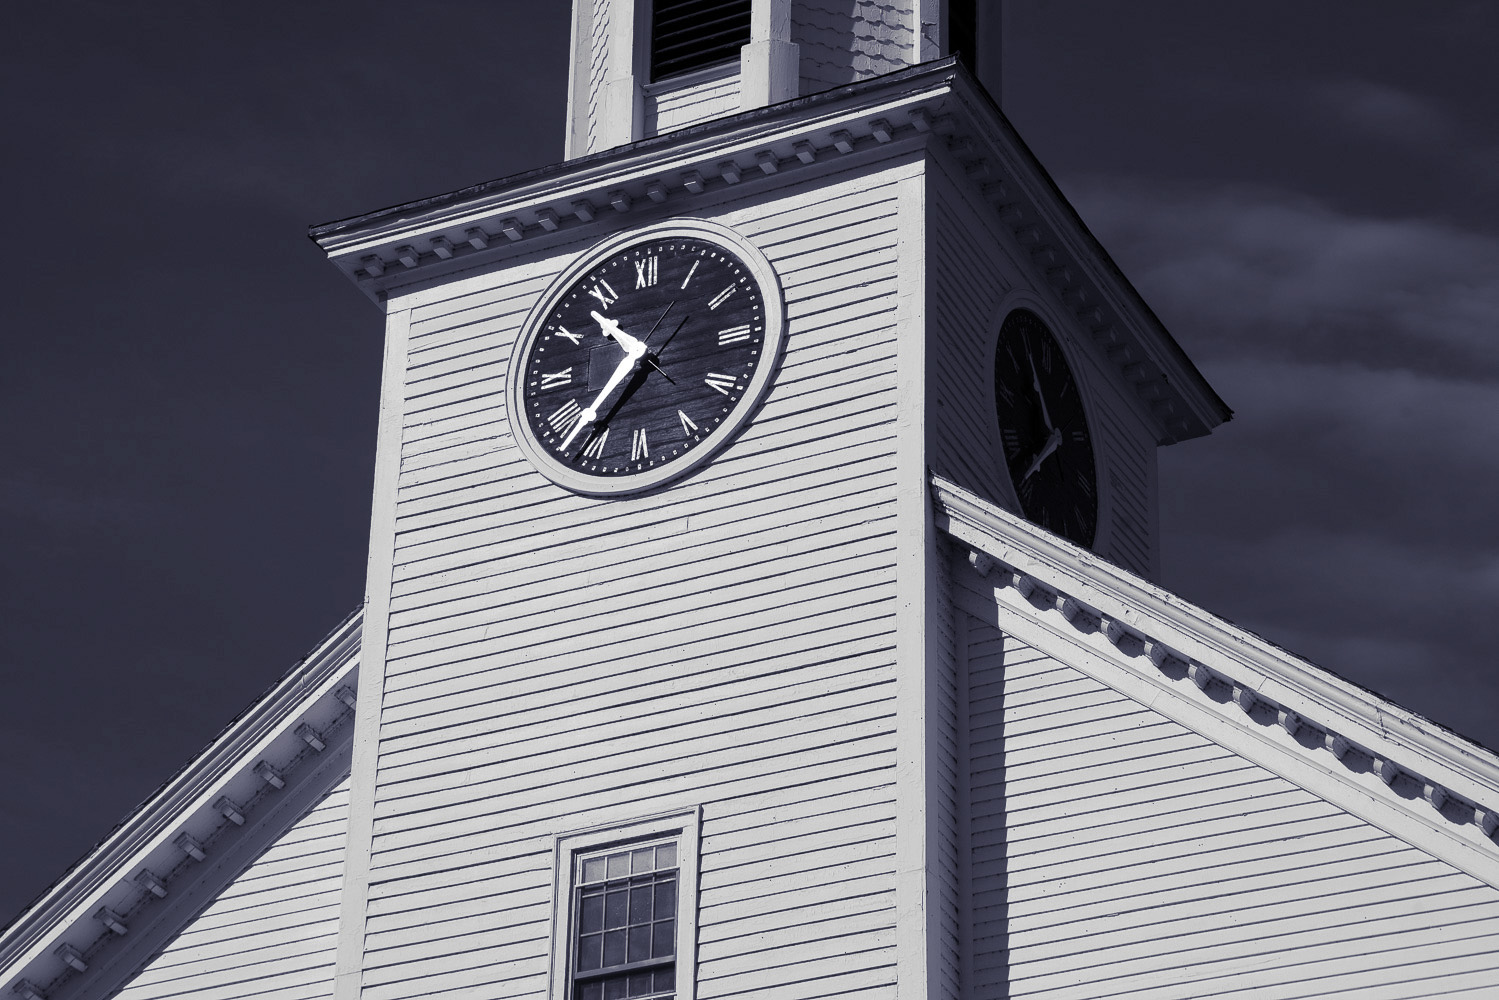
The sky and shaded areas have been fully toned with blue. Because we specified high fuzziness, the brighter values have been colored - but minimally.